
Installing the Propellers
/During our recent boat haulout Ron swapped the propellers. Remember the pretty props that I showed you a month ago? It was time to put them to work. First he removed the props that were on the boat. Here's what he did:
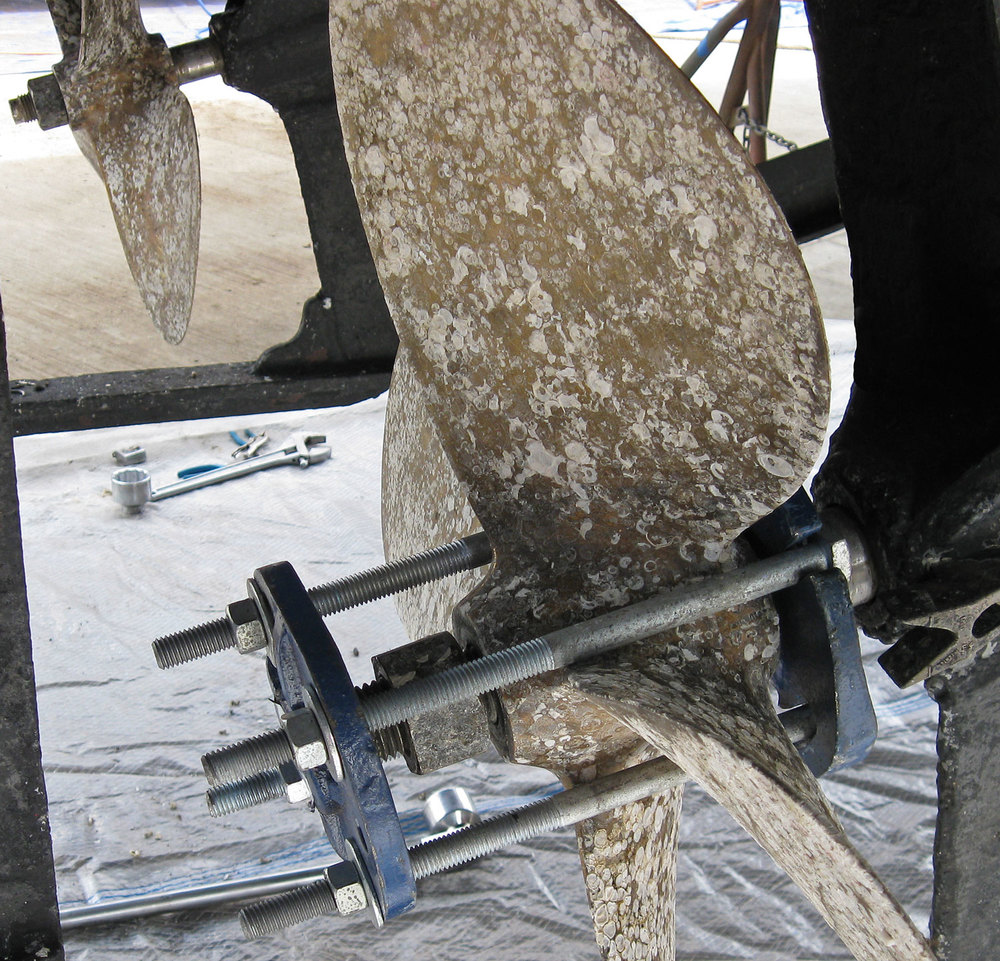

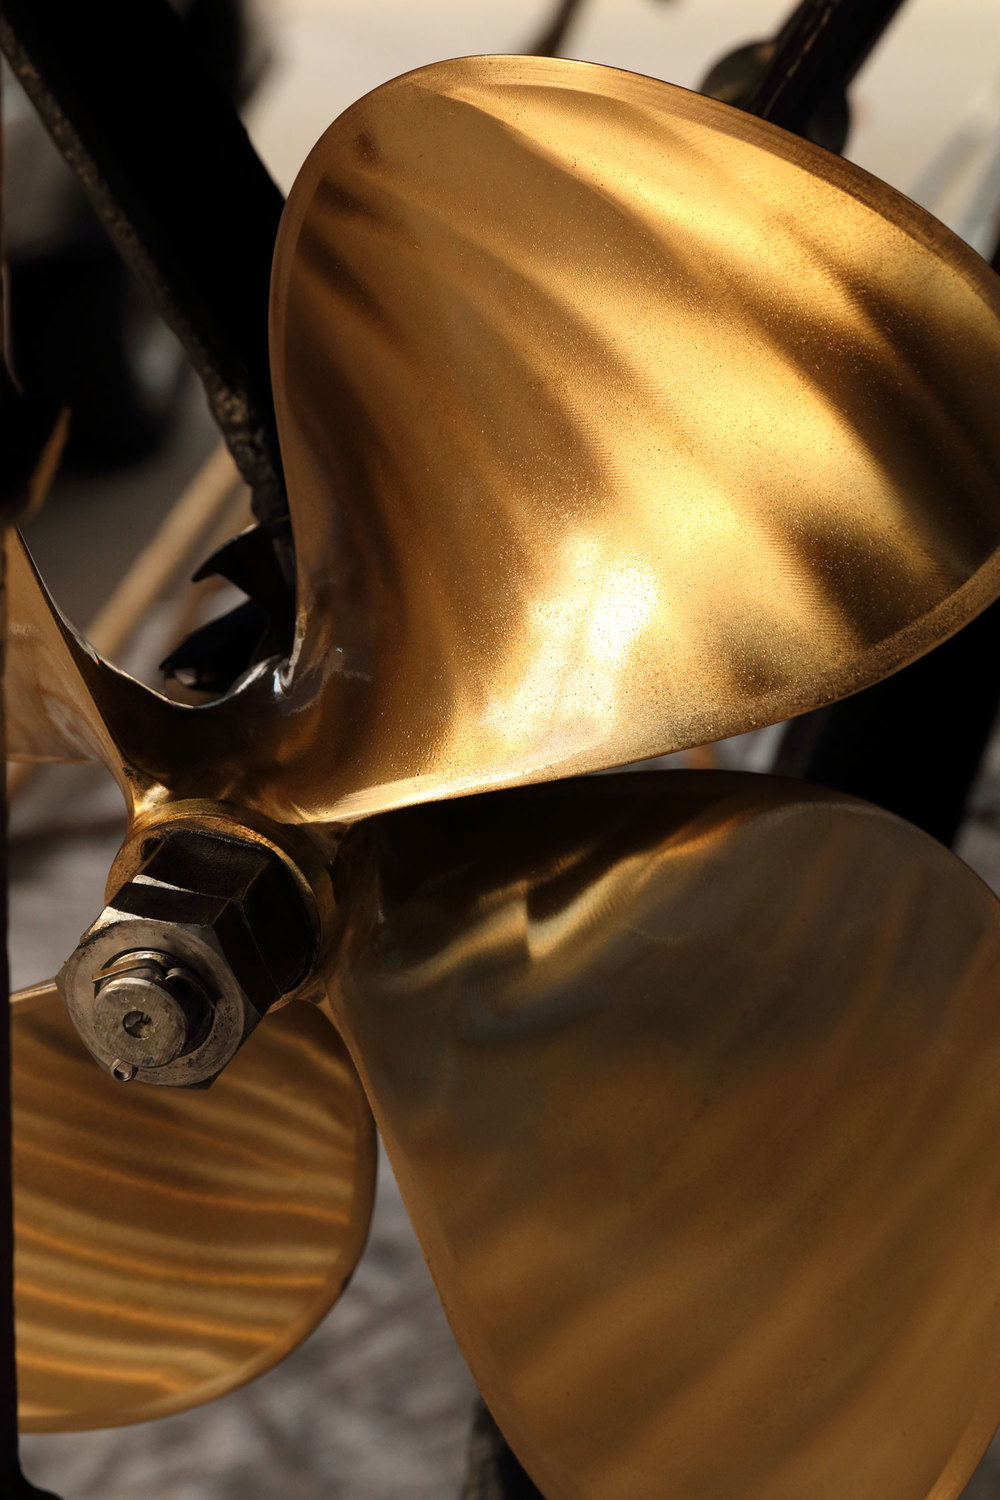
The prop nut was backed off a few turns, and left there to catch the prop as it popped loose from the shaft taper.
- Remove the cotter key.
- Remove the jam nut.
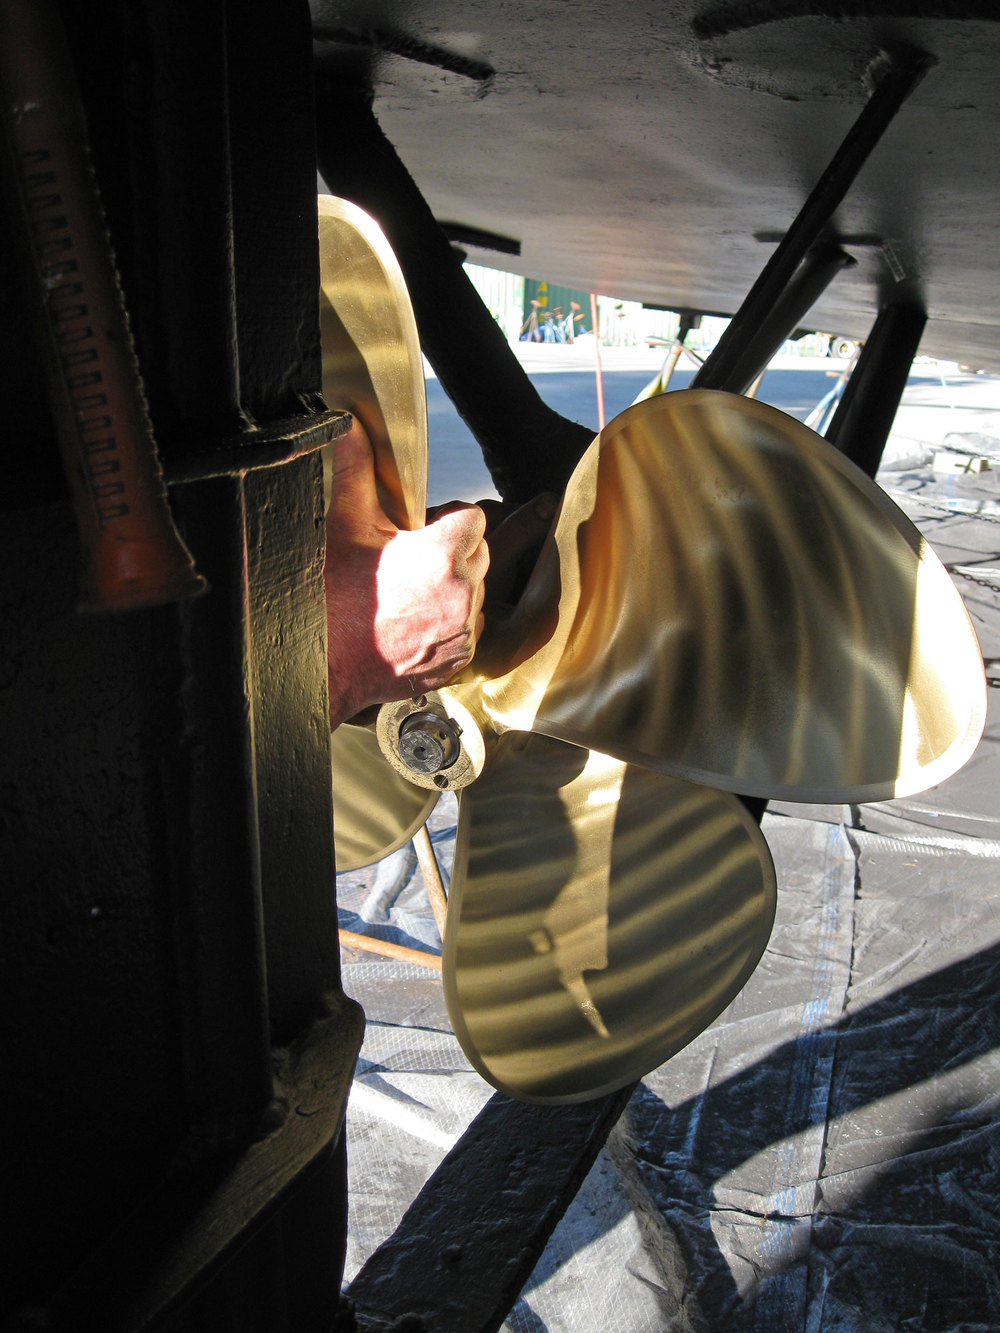
- Block the propeller with wood to keep it from turning.
- Back the prop nut off just a few turns. It was left on so that the whole works didn't end up jumping onto the ground VERY suddenly.
- Remove the block of wood.
- Assemble the prop puller around the prop hub with the plate on the end of the shaft.
- Tighten the nuts on the prop puller evenly, keeping the plates parallel. Take half a turn at a time on each nut until the prop jolts loose from the shaft taper.
- Remove the prop nut.
- Slide the prop off of the shaft.
- Tap the key out of the keyway.
- Put the nuts and key into a Ziploc bag and mark the bag port or starboard.
After the new bottom paint was painted on and the shafts were cleaned up then it was time to put the reconditioned propellers on. They are counter-rotating, so it is good to know for sure that they are going onto the correct sides. Most propellers will be marked for rotation with LH and RH for left hand and right hand.
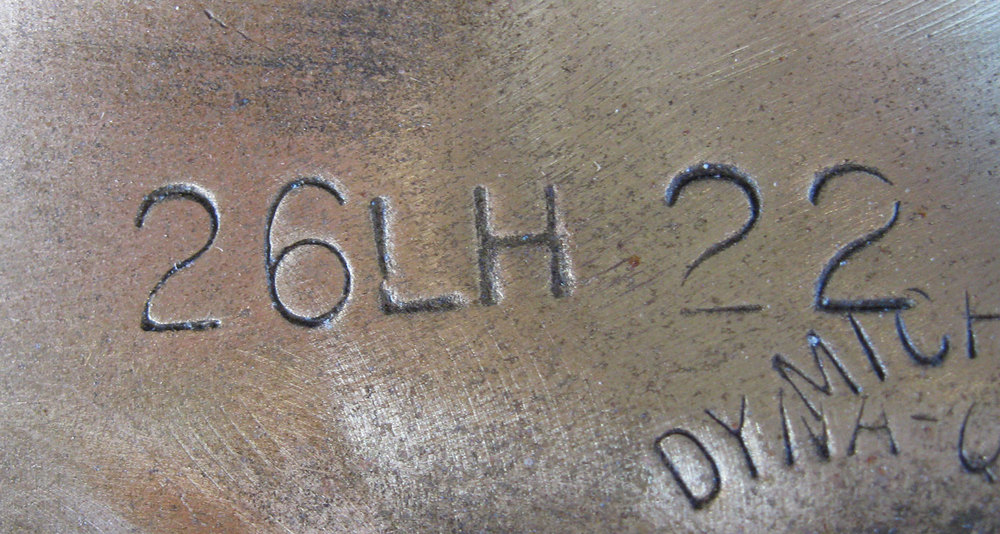

26" diameter, Left Hand, 22 inches of pitch.
Here's a quick way to confirm that the props are on the correct sides on a twin-screw boat. Stand between the propellers facing the bow. Put your hands out to the propellers and grasp the upper blade closest to you. The angle of the blade should fit naturally into your hand, as in the photos below.
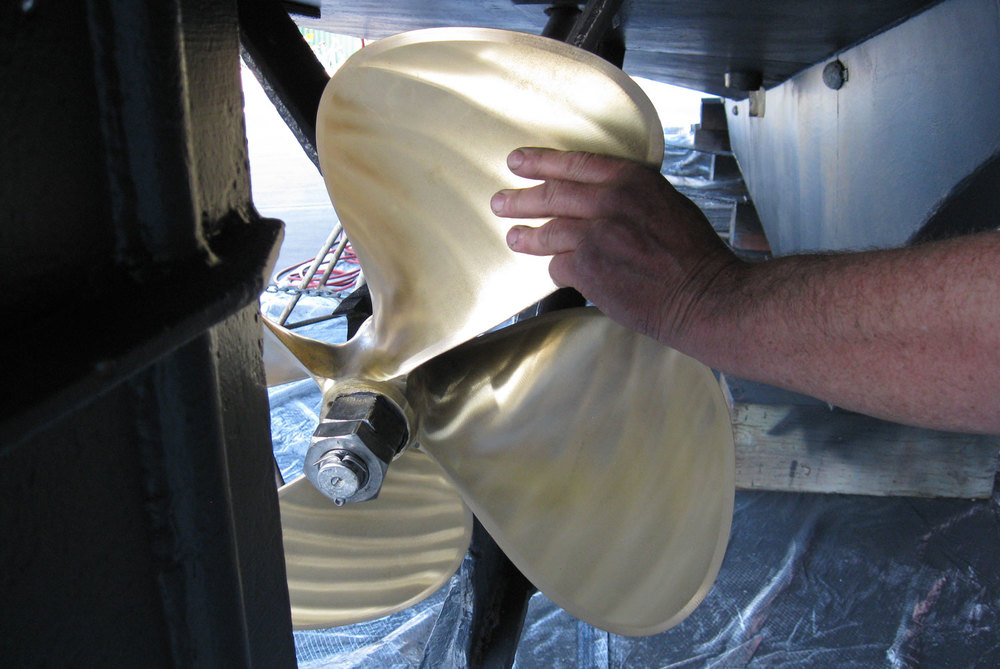

Stand between the propellers facing the bow and reach out to the closest upper blade of each propeller.
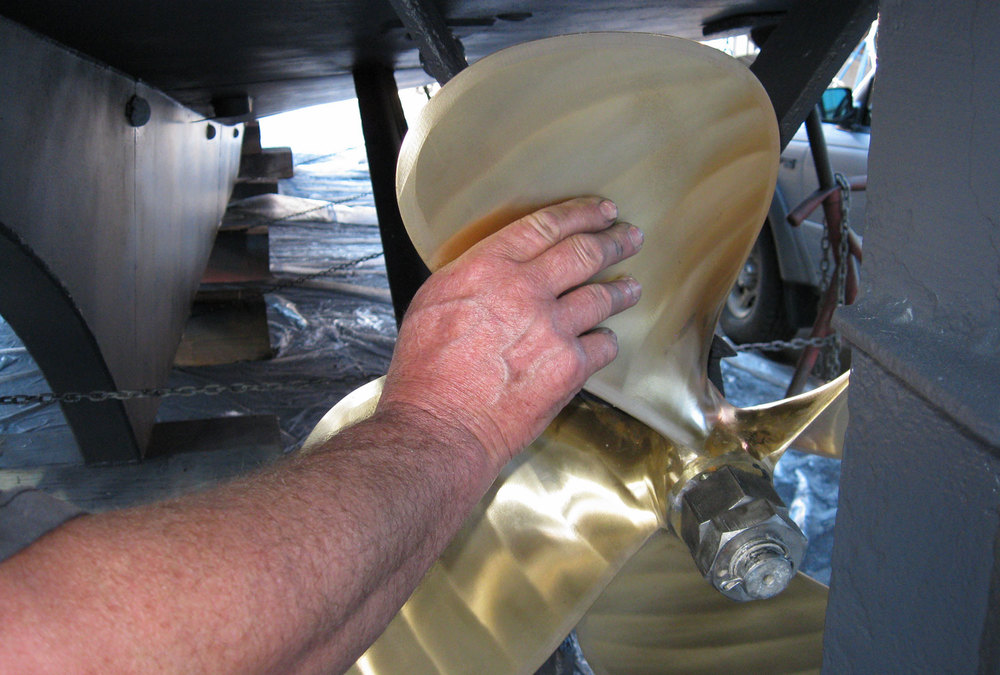

If your hand slides naturally onto the angle of the blade then the prop is on the correct side.
Now it was time to put those pretty propellers on. The process went well! Here's how Ron went about it.

- Ron tapped the key into the keyway on the shaft.
- He checked the rotation of the propeller and slid it onto the shaft making sure that the key was fully engaged in the prop keyway. The port key had to be tapped back into position before the prop would slide all the way on.
- Anti-seize was applied to the shaft threads.
- The larger prop nut was screwed into place. The flat face of the nut went against the prop, and the beveled side went against the jam nut.
- The block of wood was put into place to keep the prop from turning, and the prop nut was tightened.
- The wood was removed.
- The jam nut was screwed into place, again with the beveled side aft.
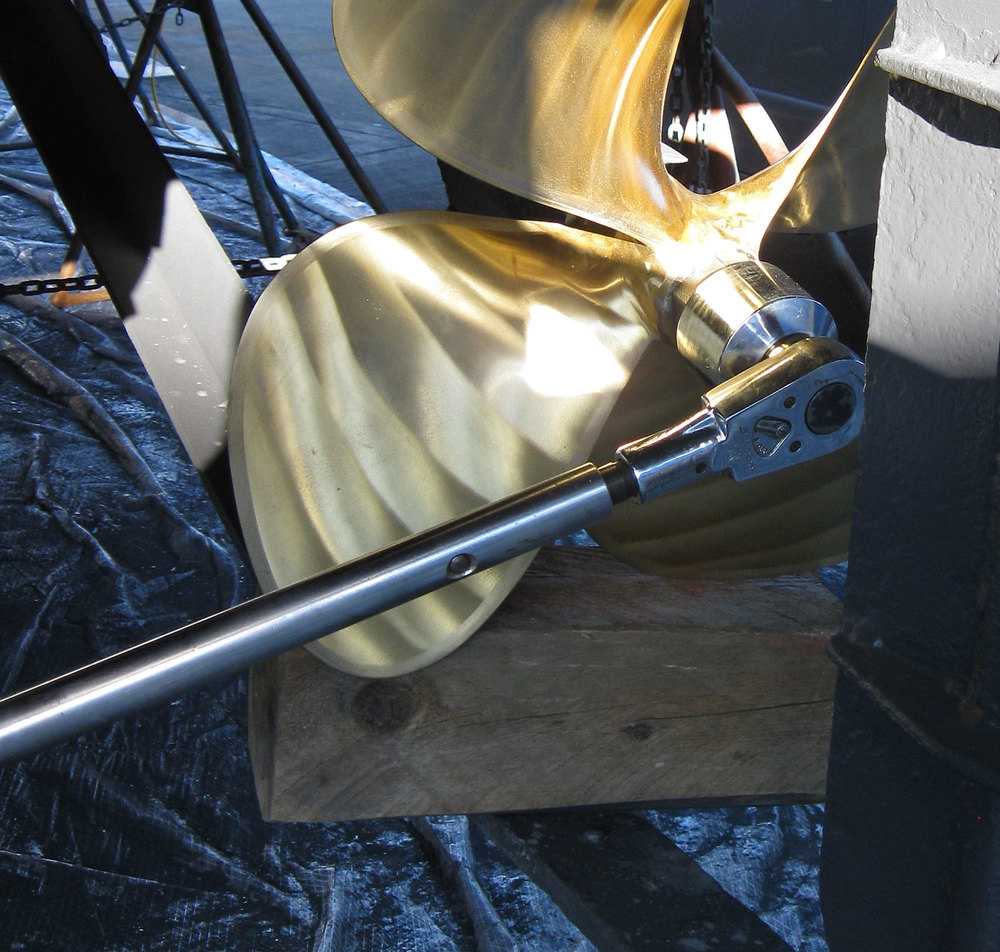
- A wrench was put on the prop nut and braced against the skeg to keep the shaft from turning. The jam nut was tightened.
- The stainless steel cotter key was slid through the hole. Ron grasped the very ends with pliers to pull them out to the sides. This made a smooth radius on the cotter keys. If they are crimped hard over then it can weaken the metal, causing the stainless steel cotter key to fail.
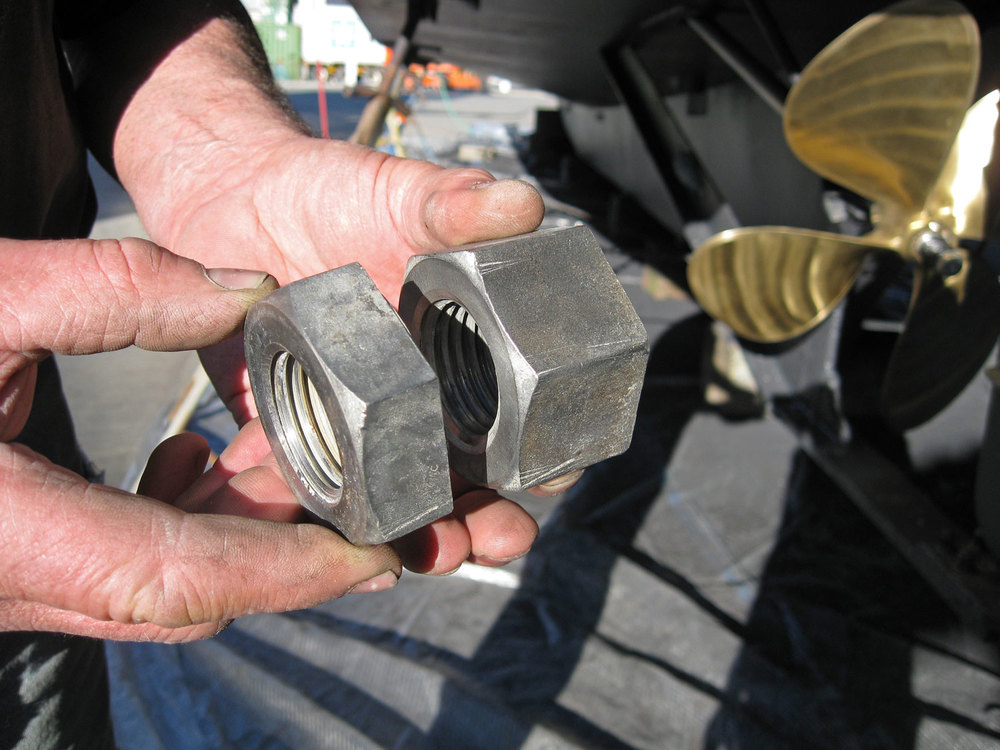

Each nut has a beveled and flat side. The flat side goes forward and the beveled side goes aft.


The ends of the cotter keys are pulled over in an arc, not crimped hard over.

The block of wood keeps the shaft from turning while the prop nut is tightened.


Bracing the prop nut while tightening the jam nut.
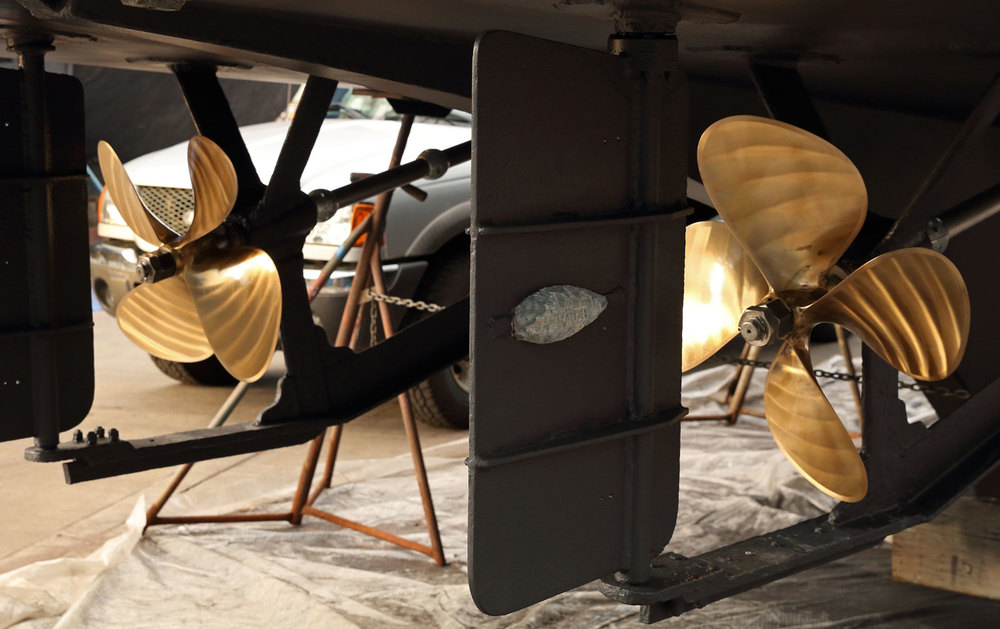

With the pretty props in place, the line cutters installed, and new shaft collar zincs bolted onto the shafts the boat has her jewelry on.
After the boat was splashed we ran it out to check how the smaller propellers performed. Good news! The engines came up to their rated rpm's, and the turbo chargers kicked in properly. The boat handled well, and it seems that this set of propellers is correctly sized.

It is good to be afloat again! We have spent a lot of time on the Gotta-do List, and soon we will be able to spend some time on the Wanna-do List. I'm looking forward to sharing some fun stuff with you!
Alaska Beachcomber
Related post: Pretty Propellers.
See how the boat is lifted onto land in Haul out.